


When I was asked if I could make a mobile for a family member I was so excited to give it a try. They had provided a picture for inspiration and gave me some creative license. The mobile was a felted wool mobile.
The mobile’s main feature was to be a whale and it would also include some flowers and leaves. Looking at the mobile I knew it would be best to approach the design with some wet felting and some needle felting.
Materials
dyed wool roving pink, yellow, green, grey, brown, white and purple
plastic bubble wrap
fine tulle or netting
Laundry bar soap I used Sunlight
bamboo place mat or sushi roller
access to double sink or bins to hold 1 hot and 1 cold basin of water.
Large sponge, I find the smooth ones work best
We will begin with the wet felting to build sheets of coloured wool felt to use for the flowers, leaves and sides of the whale.
Wet felting is achieved by doing all the things you are typically told not to do when dealing with a wool garment. To felt you need, change of temperature, agitation and soap.
 The first step I took was to dig through my stash of dyed wool fleece. I choose the colours I wanted.
In some cases the colours weren’t exactly what I needed. Just like mixing paint to achieve a colour, you can mix colours of fleece on hand carders and continue to card until the desired colour is reached.
Once you have the colours it’s time to begin the wet felting process. Pulling out thin layers of fleece the length of the staple, lay a thin layer on top of some plastic bubble wrap horizontally. Build another thin layer placing the fibre vertically. Apply a third thin layer horizontally. Continue in this manner until the desired thickness is achieved.
Cover the fleece with a piece of fine tulle or netting. Using a sponge and very hot water wet all the fleece. It needs to be fully saturated but not dripping water everywhere. Now rub a bar of soap over the netting. I use a laundry soap bar. Work up a lather so your hands will easily slide over the surface. Dig out the elbow grease and rub the surface using small circular motions.
Periodically pull back the netting and do a pinch test. If you can pull up fleece between your index finger and thumb it is not ready. Place the netting back into place and continue to rub. Once you cannot pinch up any fibre move the felt onto a bamboo place mat or sushi wrapper. Roll it up and now roll back and forth about 100 times. Open the bamboo Matt turn the felt 90 degrees and repeat. You will notice the piece will be getting smaller and thicker. That’s exactly what we are going for. A nice solid piece of felt.
Next plunge the felt into a cold bath of water. Using both hands rub the felt back and forth like you are trying to rub out a stain. When the felt feels like a smooth piece of material rinse out the felt going from very hot bath, then a very cold bath. Repeat by alternating from hot then to cold bath a few times. Squeeze out the water. Pull around the edges to straighten as best you can, lay flat to dry. Rolling the felt in a towel then stepping g on it, helps to remove most of the water and cuts down drying time.
For this mobile sheets of felt in pink, yellow and greens were made for the flowers. Grey sheets for the whale. A variegated piece with browns, pinks and purples for the shells.
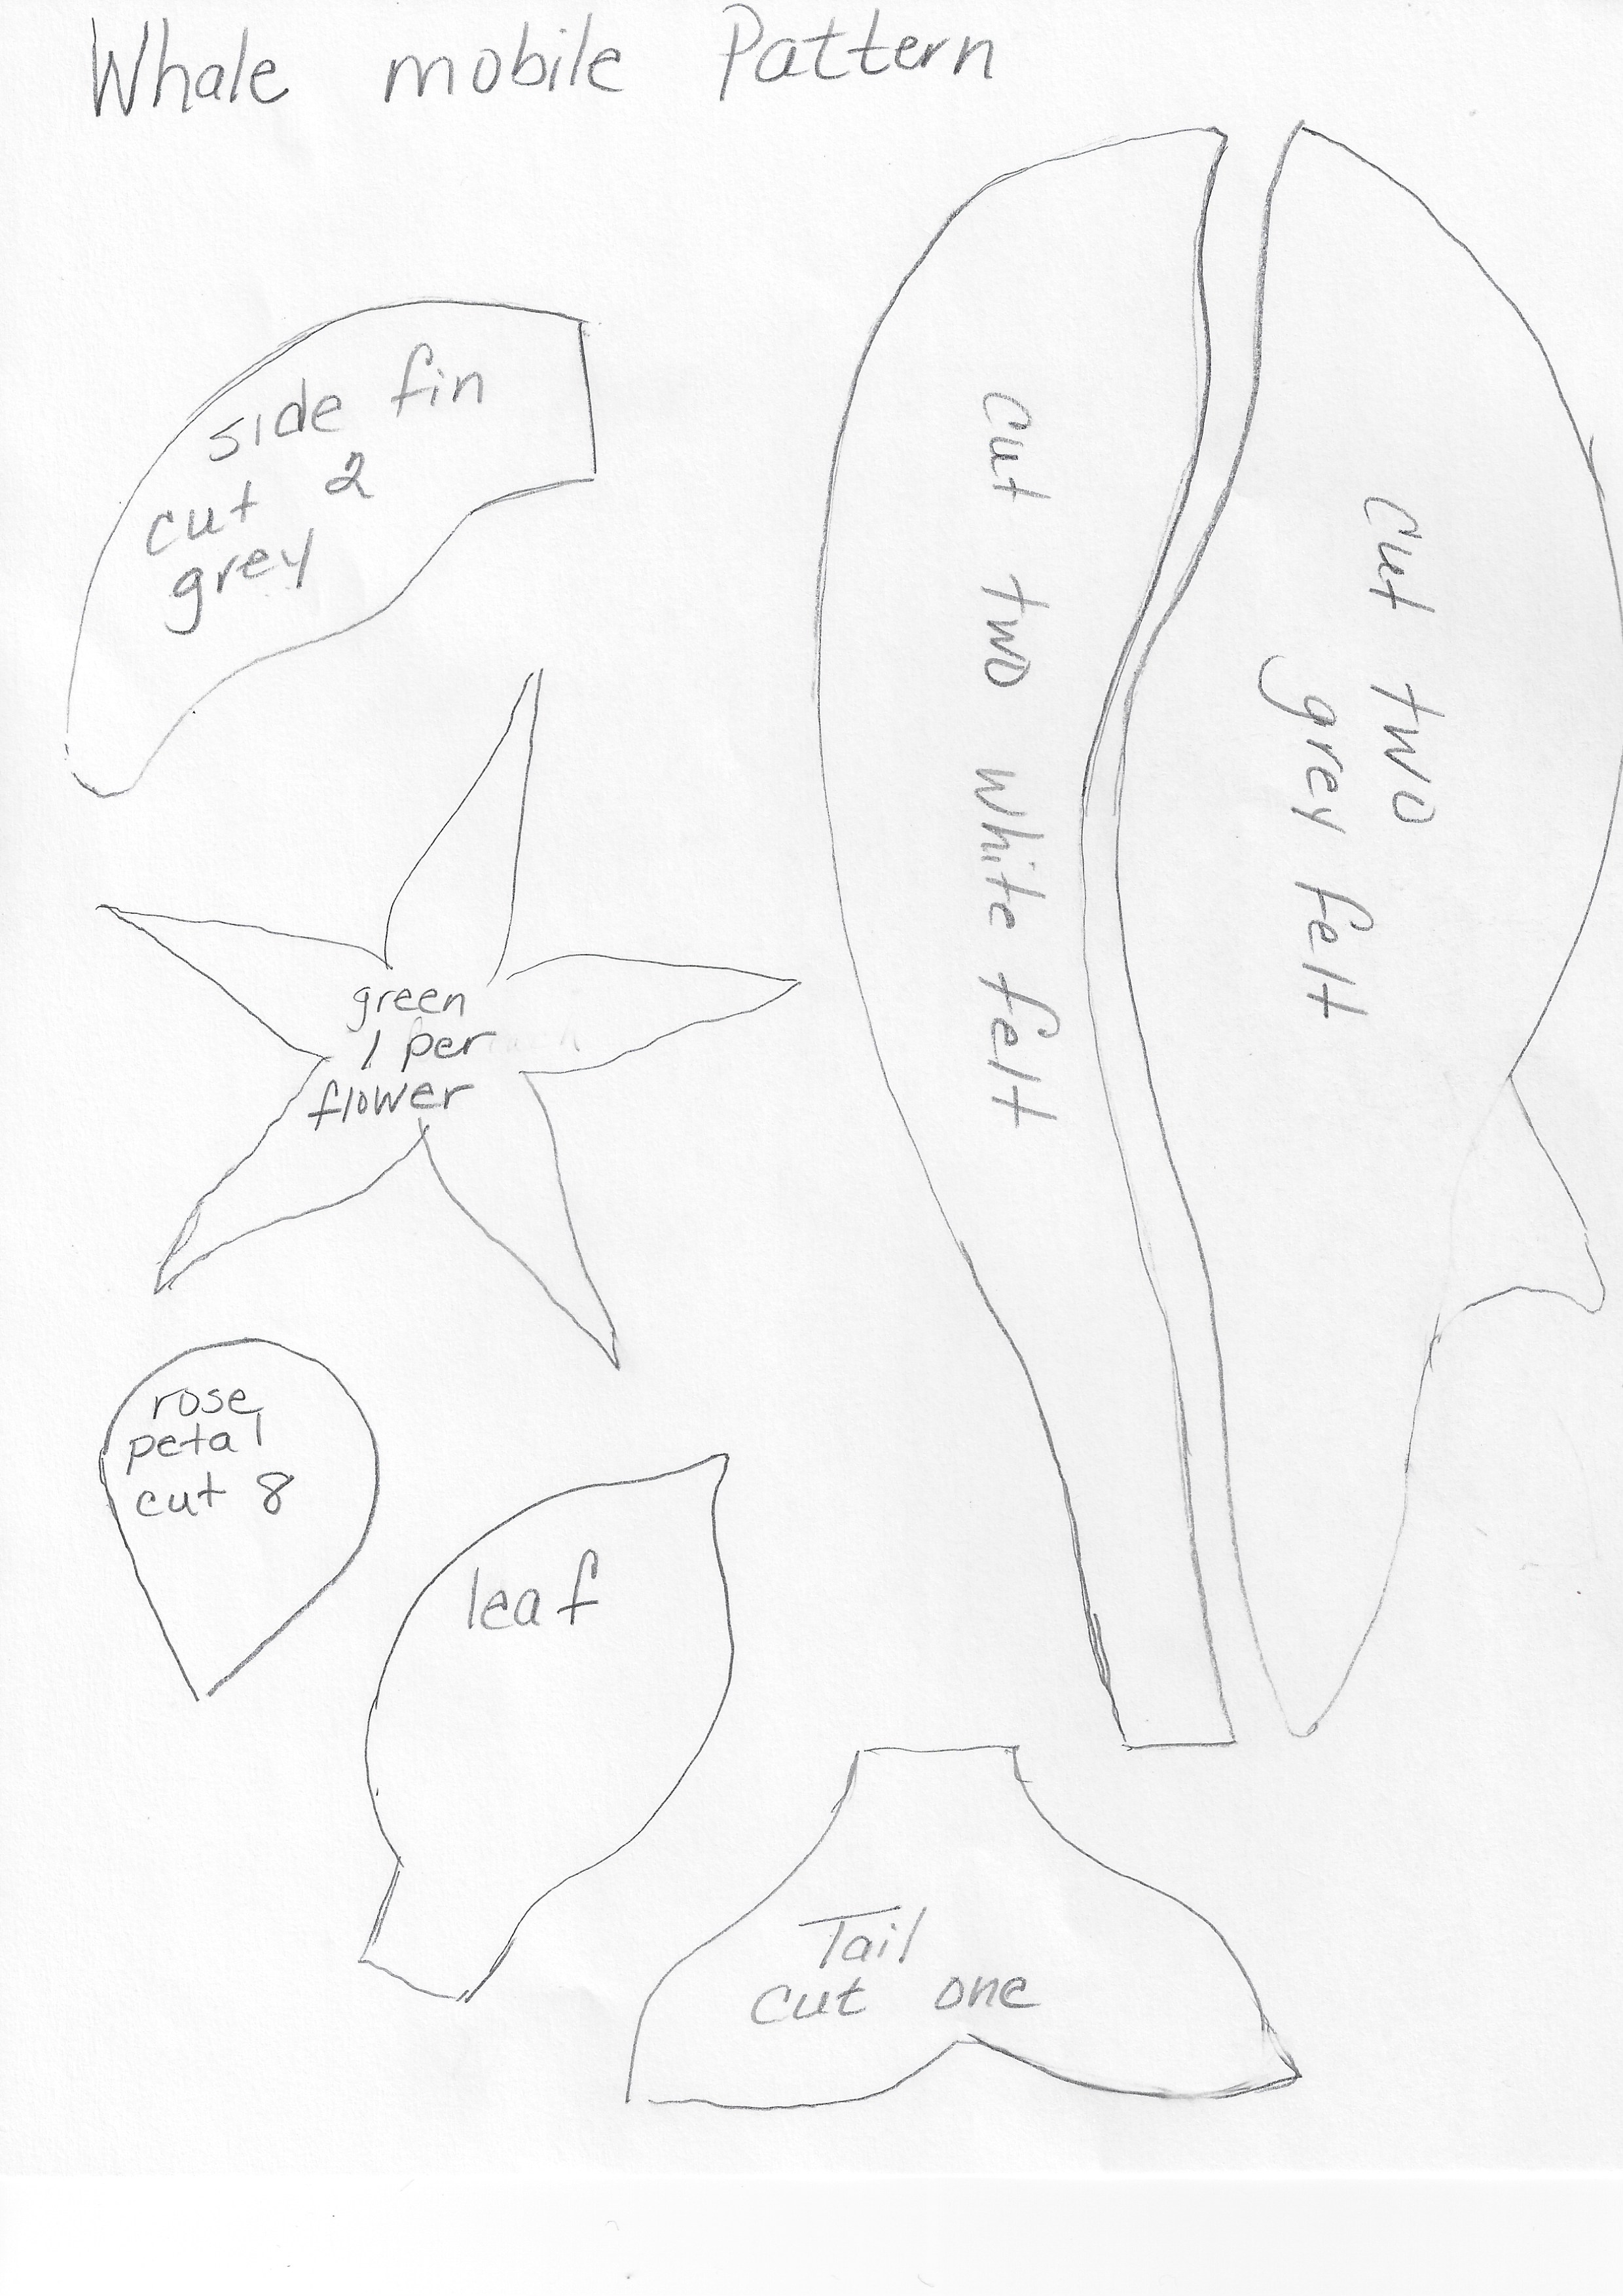 Free Printable Pattern
2 Responses to “Wool Felted Mobile Tutorial Part 1 of 3”
It is just so beautiful!!!
Thank you.